Hello, I'm the author of Greco Advocacia, and I've come to thank you for your support and to teach you a few things. I see a lot of people wondering how some authors draw so fast and yes, there really are teams, buffering and other details that allow them to do so. However, there are tricks I'm going to share that I've learned to help anyone I can.
1 - Draw in blocks - Simple, if you're going to make your comic make all the pages/panels you need as follows:
Draw all the sketches of all the panels you have
Draw all the lineart of all the panels you have
Draw all the shading for all the panels you have
Do all the painting of all the panels you have
2 - Don't do it in vertical mode but as a western comic. I know we're going to post it in vertical format for scrolling, but during the drawing process do it in western format and then copy and paste the finished panels into your webtoon. You'll save a lot of time by being able to see 9 panels at the same time to work on them rather than having to scroll around to draw.
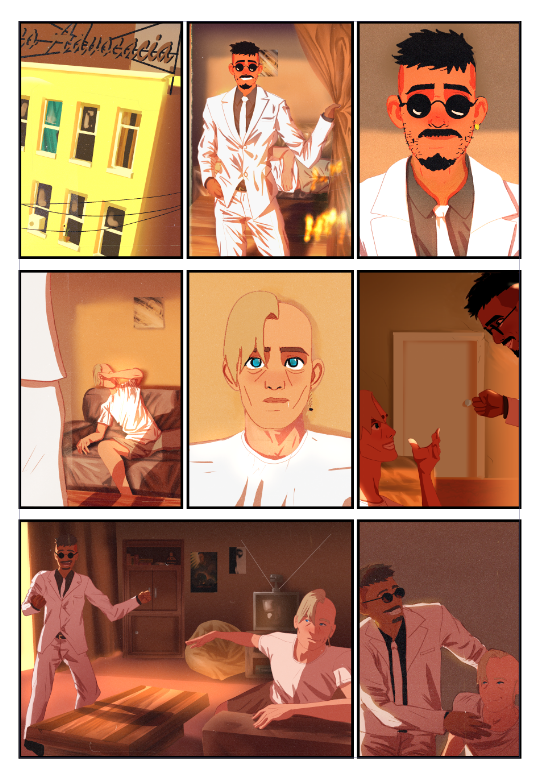
3 - Use the frame templates, in clipstudio there are ones that already come, but you can download them, this tip is essential for the next tip and will be a great trick. When you use these templates you can draw inside the panel only or outside all of them, if not, use them, I highly recommend it.
4 - Top tip: Do all the sketching on a single layer, do all the lineart on a single layer over all the panels, do all the colors on a single layer (this can be separated if you like). Quick example:
Layers in order:
Lineart (here you draw all your lineart over everything, don't worry about making mistakes, only what's inside the panel we're keeping)
Sketch (here you draw the sketch over everything, the whole sketch of all the panels on the page)
Panel 1
Panel 2
Panel 3
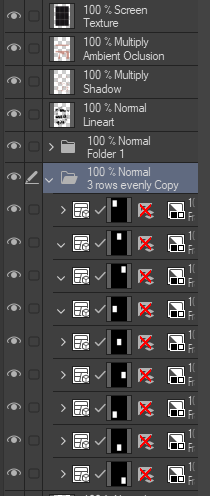
Now you're going to use the magic selection tool to select outside your panels (I recommend that they're all in the same folder so you only select the folder) and then you go to the lineart layer or any other and delete it. Then everything that isn't supposed to be in the panel will be deleted. You save a lot of time traveling from layer to layer just to do the same thing you've already done on another.
5 - Have your color palette ready: Always have the palette open in a nearby window or already customized in clipstudio. clipstudio allows you to create customized palettes, if you search you'll find the form easily, photoshop I'm not sure, but it seems to have the same feature.
6 - Have all the faces ready. This is one of the things that I'm very fond of. Having the basis of your characters' faces at different angles is a great way to save time, I highly recommend it to everyone. This way you can only modify them according to emotions and situations.
7 - Use tools like sketchfab, posestudio and even AI to help you with references for scenery, poses and objects. Anything goes so that you can do your job quickly and well.
I hope this can help everyone. Sorry for writing so much, it's because I needed to describe it as well as possible. Good luck to everyone!
