1 / 10
Sep 2020

Hey all I'm trying to get into photoshop scripts and make better Photoshop actions to make my comic process a lot faster (especially when doing color comics OMG) and so I was wondering if anyone else here has done that, and if they found any neat scripts that they use, or if they know of any neat tutorials of how to write the scripts (I do have some coding in my background, I've taken college classes in C++, I just don't know the language photoshop script uses really well, and Adobe has a library but like...that's it. I'm struggling to find good free resources for beginners that aren't for like...computer scientists)

Myself I just recently downloaded a script for applying an action to multiple layers at one time (but it's somewhat busted, I had to change the background color because the font was like...white on a white background fml) to help and make my pipeline faster. It's been suuuuper beneficial.

My end goal is I want to eventually I want to make a script that can get a long photoshop document spliced and stowed away to upload to tapas or Webtoon (and there is croppy for this--I just prefer Photoshop's compression because it's smaller sized documents and it tends to look better--not offense to croppy or anything like that, they do fine work. But I want to save a step.) Photoshop unfortunately has a cap to how long you can have an image in Save for Web and Devices, and so it's...kind of annoying to use it for splicing currently without using a script. If you know of a script for this sort of thing--uh--let me know! I can't find one!

So I was going to open up this thread as a library where we can upload links to good scripts (and you can do SAI and Clip Studio scripts as well, if those exist) because we have threads for brushes--but not scripts and actions.

(here's the apply actions to multiple layers at one time script, although it is slightly busted.

Again it's a little bit of a mess and I'll have to make adjustments to it once I figure out how to...write this code properly. But it looks like the original maker just kinda dropped it on the internet 3 years ago and bounced so I hope they don't mind.)

  • created

    Sep '20
  • last reply

    Apr '21
  • 9

    replies

  • 2.1k

    views

  • 4

    users

  • 8

    likes

  • 5

    links

Wow, advanced stuff. I think I used Photoshop actions once, to resize images or something. I don't even remember XD

Yeah I guess I should make a little explanation for other people that want to use scripts but don't have any freakin clue where to start (so this is for generally everyone and not just for you sush, no worries) But luckily it's not too, too difficult to set up if the script is already available for you to copy paste, and especially if you have some experience with some sort of code let it be HTML or CSS.

What you do is you take the script, copy the entire thing, paste it into a text document that will allow you to save the script as a .jsx (I use notepad for this. Not sure if this will work off of word or open office. "jsx" will not be a format in the pull down, so you must type it in yourself and in the "save as type" make sure it is as "All Documents" and not a text document) You can name that .jsx file anything you want. Once it's saved as a .jsx, then it becomes the right file format for photoshop to read.

Then you open up your photoshop files (mine are in my C drive under C>>Program Files>>Adobe>>Adobe Photoshop 2019 (or whichever version you're using. 2020 is a little busted so I switched back to 2019)>>presets>>scripts) Once you have that file open, you can copy paste the .jsx file you saved before to this folder (it doesn't need to be nestled deeper than the scripts folder. It asks for admin permission, and I say "I have permission" and that's it.)

You do have to reload photoshop at this step, but once you do--your script should be loaded, if everything went correctly. You find it in the menu under File>scripts

The name of the script should be there, as the same name you saved your .jsx file as. (this is something I lifted off of the internet, so they're hovering over "browse" but you shouldn't have to do that. Notice how they have something greyed out called "Flatten All Layer Effects" and "Flatten All Masks" those are scripts. They're greyed out because they haven't opened a file.) When you click on the script it'll open a window that runs your script! Some scripts won't open unless you have a file open, however--so just make sure a file is available and test it out for yourself.

What makes a script different than an action, is that an action is a function that you make, and a script is a program that can perform many actions at a time. So I may have an action that applies a function to a particular layer, but if I wanted to perform that action multiple times on multiple layers (lets say I have hundreds of layers) then you can use a script to do that in one click.

Since comics lend themselves to using one pipeline over and over again--there's probably plenty of room to start customizing actions and scripts for your own unique style to save lots and lots of time.

Yeah it's good stuff here--a really good library for looking up stuff. A lot of it goes over my head, because they assume you're well versed already. But, I just gotta bite the bullet, ask my computer engineer brother to help me, and spend the time to memorize the language. Eventually I will figure out how to change the font color in the UI window :joy:

On quick inspection of Adobe's scripting guide, they use VBS, Javascript, and Applescript which I do not know since I don't use Apple at all, but seeing how these are scripting languages, they are more limited.

The script in PS isn't quite a program, rather a set of commands. It's an additional QoL as it automates repetitive stuff. It adds conditional logic to macros so real nice. But it can't do everything.
--

Adobe scripts won't be able to upload pages right from PS to Tapas, you need to develop your own program for that.

I would have to check their manual a bit since I am not really familiar with JS syntax despite seeing it a million times. To be clear, you wish to make a script that will, what, crop and save all your pages to a designated location?

Or, if you're looking to create templates, you could try this:
PiXimperfect3
He's the fricking PS master
(If this isn't what you're looking for, still probably helpful for people)

I might just be misunderstanding something. I can fix whatever is wrong with the script you're using though. Sounds like whatever predefined values he used doesn't work with your setup.

Yeah, thanks for the clarification on some of these things. I get mixed up on the lingo honestly.

What I'm looking for isn't to upload directly to tapas straight from Photoshop (I think that's impossible at the moment because we don't have that much control of our Tapas pages. Been a while since I messed around with PHP servers and the like((hell I don't remember if it was even called PHP anymore))--so I know it is possible to upload directly to a website from Photoshop because I have done it, but that's more for my own website I have all the permissions for.)

It's more that Photoshop has a height cap when it comes to saving splices of your long posts into pngs or jpgs. I'm looking into seeing if there's either a way to over-ride the height cap through a script or to write a script that will just do that splicing on it's own without having to physically chop up the long file. (or ideally, to find a script that has already been written) Right now I can save the long file as a png and send it to croppy, but then I end up compressing the same file twice (3 times, if croppy doesn't do it small enough.)

I will absolutely check out that link though. I'm rusty on my scripting.

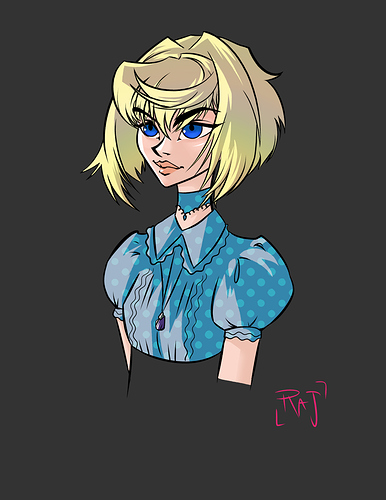
Hey quick update for those curious to how my "save time through actions and scripts" is going. Just figured out something that saves a hellllll ton of time (and works for Clip as well--I use photoshop, but you can absolutely do actions in clip), so if you are like me and you enjoy using lots of clipping layers with gradients and solid colors to get a style kinda like this:

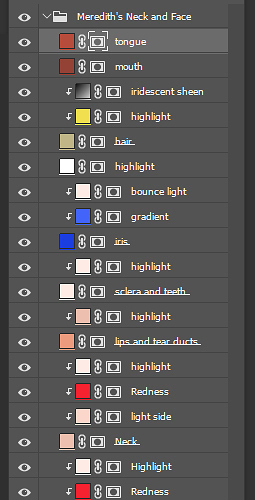
which unfortunately has this number of layers for even this small figure (fml the layer hell--I used to just never label these, ps, and so trying to manage them between dozens of panels per update was such a headache that wastes sooo much time when you do color comics. But here I've labelled them and I'll get to why these layers are even labelled in a bit.)

I desperately wanted a nice, quicker way to do them so it's less about labeling layers, making layers, and laying gradients, and more about actual painting and drawing.

I figured out from when I did this short story before that had a hell ton of clipping layers that I was constantly checking back to a concept art that I had drawn to make sure all the clipping layers were at the right opacity percentage and yada yada-- and every single panel had basically the same layers--the same set-up--and the same names. And doing that over 150 times was just...so much of doing the same thing over and over again. So this time, with my next project, I'm never doing that again.

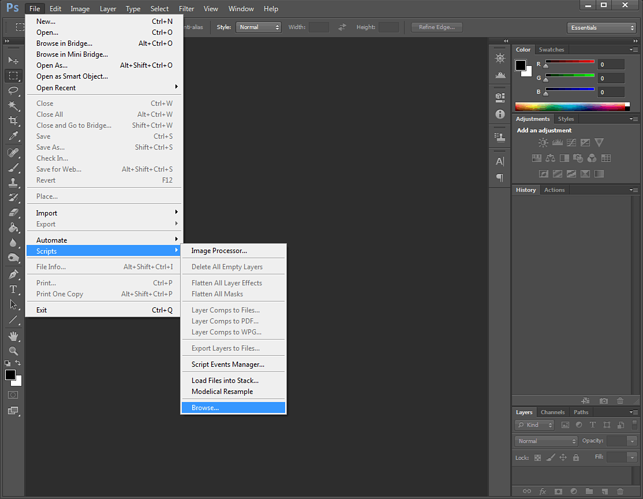
Behold: the Meredith's Face Action (My main character's name is Meredith. This action just covers her face and neck)

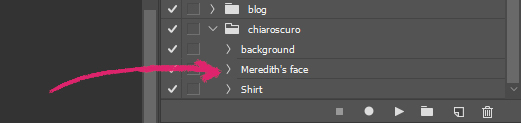
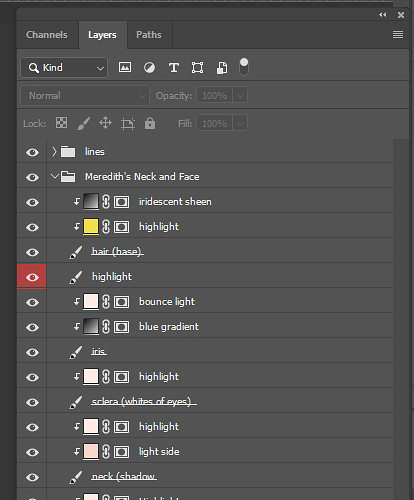
I click on it once, and it sets up all these layers that you saw before in the folder "Meredith's Neck and Face". All of em.

How it works is that all of the fill and gradient layers I've done through swatches are set to clipping layers that are empty when I first hit the action. Those same fill and gradient layers--all those highlight layers you see there, are set to a mask that is inverted, so when I place a base color in the layer they are clipped to, you initially see no change. But, if I take a brush of any type and draw in the mask layer, it will draw in the highlights in the exact colors and the percentages I need.

And what used to take a while (sometimes if there's a lot of layers, with a lot of characters and elements, it would take nearly an hour or more) now takes...less than 3 seconds. I can add more of these for other characters, for particular outfits, or for BG's if I so desire. But the idea is--I set this up once (and the set up took a little bit because I had to figure out how to make actions correctly. occasionally it'd clip to the wrong layer? It's a little finicky) but then I never have to do it again.

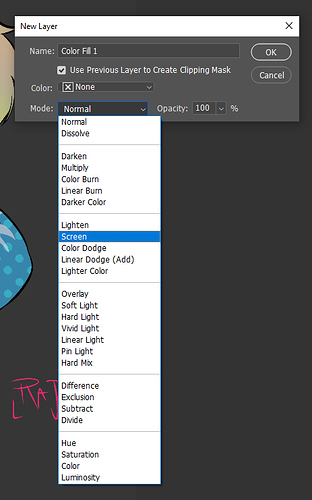
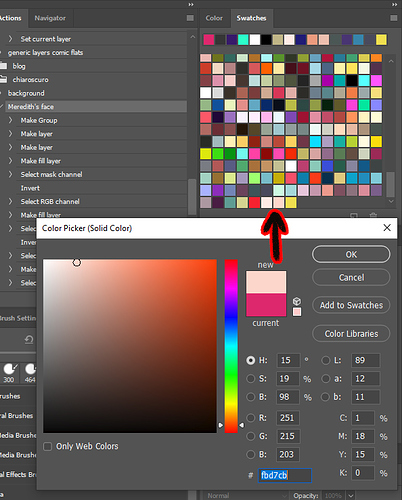
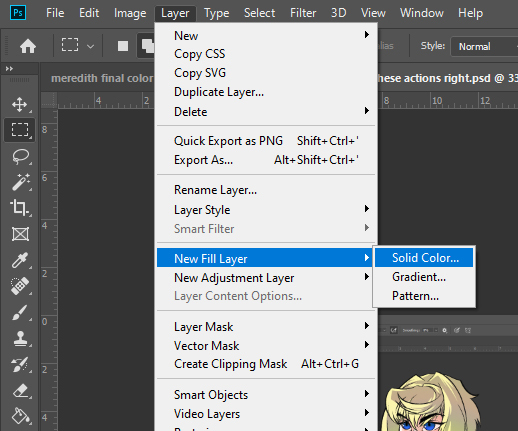
So here's how I did most of the set up: by using something called "Fill layers" and "Gradient layers." I used to think these were an absolutely useless part of photoshop--but what's nifty is that if you use them in an action, they will automatically have a mask attached so all you have to do is invert the mask as you record your actions.


and what's neat is that you can set things like the layer styles, clipping, opacity--and even labelling them so everything is neat and tidy.


and then just use colors from a preset

Anyway, I just thought this was neat. I'll see how it goes, and get back to y'all if I find another action or script that just saves a hell ton of time or if this idea is actually a bust. But so far it works!

6 months later

Some of you may know about my weird ass coloring method, and I'm talking about it again to tell you how it went, because I've been REALLY enjoying it since last September, it's saved me like 10+ hours of time, and recently, I made a tweak to make it EVEN FASTER so I want to share it with any of you who may be interested.

See, I hate going into my color library and clicking on the exact colors I want and then using it to fill my pieces. Not only is the task of going back and forth such a boring pain in the butt, I have some people who have like 10+ bits of exact colors that need to match every panel, and my library just looks like a huge mess now! I keep losing colors in my own library, and they're very slightly different shades of pink and so I mess it up a lot.

So I realized...why not just make the base layer a color fill layer like I did with everything else!? So that way I'm no longer selecting colors from my color library on things like characters and their clothes, which are always the same shades (and I can put a clipping layer on the group folder if I want to make adjustments)

Behold my new and improved action I use to color Meredith's face (which is based on the action I made in the post right above this one) that makes all of this in one click!:

What I did, is I have a color fill layer that is the color of the thing it says it is (so meredith's eyes are blue, so her iris is a blue fill layer) and that layer is set to a mask that is inverted, so initially nothing is visible. But, when I use my selection tool to grab her eyes from my flatting layer, I can then click on the mask of the iris fill layer. There I can use the paint bucket to fill that selection in, and iris will be the right color every time because masks only care about white or black. I never have to touch my color library! I can save that library for miscellaneous stuff and backgrounds that actually require me to use my brain.

I want to do a video on it because I think that writing it is...kind of more intimidating than it actually is, but I lost my voice to a bad cold I got from the DMV (the only cold I caught since quarantine, it's like...thanks DMV) but in the meantime I wanted to share the good news with all of you, because I hate the boring parts of coloring, too. And this is an idea that someone else may find helpful.

Certainly isn't for every art style, also, it would require just making an action from scratch which is scary if you've never done that. But if you're a little more seasoned--this has been working really well for me since September, so I don't want to keep this a secret, I want everyone to know about it because now I can color some panels (like talking head panels) in 10-15 minutes, and that is rad. Now the part that takes the longest of coloring Meredith is just figuring out where the yellow highlights go in her hair.

And again, if you have any actions that have helped your comic process go way faster, you can add to this post. That's what it's here for and we don't really have other threads going around about making and using actions and scripts for comics.

11 days later

Back in my Actions Thread to show you a video I made that basically summarizes what I've learned over the past half a year in this whole thread.

Granted, I might change the way that I currently do this, and I also...really really want to bring in more of Clip Studio's reference layer abilities. But for now, this is how I do it in video form, which is way, way easier to parse in a video than it is written (like I think I wrote 6 billion words in this thread and the video summarizes it all in 15 minutes)

It has a very click-baity thumbnail because I know how youtube works, but is this the fastest way? Eh probably not. The fastest way would be to make all colors flat but youknow...it's adaptable.