29 / 31
Feb 2016

Soooo pleased to hear someone else say this! I always feel like my art is so messy because it looks pretty rough if I zoom in a lot... but then that's why I make my canvas huge to start off with.

I have a long guide about how I colour my comic here4, but a shortened version is that I paint flat colours and then add details to key areas like fabrics, hair and skintones -
1

Then I go to my big library of watercolour textures and paste them into new layers, and set them to overlay/multiply/screen/whatever happens to look best in that particular occasion.

I add cell shading in a new multiply layer, in whatever colour is most suitable for the scene. Beige seems to work well for overcast exteriors, but in candlelight or magical lighting I get more adventurous.

I also colour my lineart sometimes as a finishing touch, especially to create a sense of depth.

get very experience with "Magic Wand" in your tools in paint program, and it'll lock in the barrel. and you can color within the ink lines.

Ok, you have anti-aliasing enabled. Disable it. This causes the the outlines to have fuzzy edges to avoid jagged looks (just like in games).
This causes the colours not to fill in correctly.

What you can do is, once you finished the outline of you comic, covert it to monochrome in the 'Layer Property'.
Remember to press on 'Apply expression of colour of preview to layer'. This will give you clean black lines. Once you've done that, convert your layer back to colour and then start using the bucket to colour in your image.

Here's a tutorial that explains your situation: http://tompreston.deviantart.com/art/Tutorial-Antialias-and-coloring-2884324113

A neat trick that I recently learned is: select the outside of the lines instead of selecting what area you want to color. Than do inverse and you won't miss a spot. Hope it helps.

Definetly what @eschaefges says. I don't know how Clip Studio Paints work, but if you can have multiple layers, put the inks on it's own layers. And never use the backsround one for colors, keep it white.

What I do in Photoshop:

  • If pencils and inks are on paper and scanned, make sure using the curves and contrast tool that the black is truly black rather than some dark shade of something; then duplicate that layer and call it "inks", fill the background with white or whatever base texture I want to use and set the new ink layer to multiply.
    If you work 100% digital, then of course put the inks on their separate layer from the get go. In this case you can avoid setting the ink layer to multiply. Someone likes to unlock the background level, but that's not required unless you need a transparent background for some reason.

  • Put the flat colors on it's own layer. Use the magic wand and expand the selection of a couple of pixels so that the colors go under the antialias, otherwise you'll get this weird grey artifacts between the ink and the colors due to the antialiasing. Most likely you'll still need to go back and fix some tiny corners that ended up not selected because of the antialiasing on the inks, it's quite normal. Do fix them, though, because they'll stick out badly one the image is done.

  • It might be wise to put different levels of the pictures on different layers (closeups, foreground, background, etc). It'll help if you're going to make a quick shading because then you can easily select each part via shortcut.

  • Put shades, light and effects each on it's onw layer. For shading, if you're ok with anime-style tone-sur-tone shading and want something that's not exactly super high quality but still effective, you can use pure gray (any percentage of K in the color mixer without anything else) on a level set to multiply. In the end the values of the shades won't be 100% right and the atmosphere might be somewhat lacking (though the color of the lights and the semitones - if that's how they are called in English stuck_out_tongue - have a greater impact on that), but it might be good enough depending on what you're aiming for.

there is an option on using the lasso/magic wand to expand the selection field- I use that often when digitall inking pieces, so that it inks EVERYTHING right up to the line art; that way there are no "spots" where the ink(or color in your case) was applied with the paint bucket...and in case that doesnt work, I always come back and "double tap" with a brush- just to make sure.

may want to increase the DPI of your image. 300 & higher keeps work looking pretty clean- especially when zooming in.

I would like to learn to color digitally, if only for time in the long run, but I'm way better and thus faster at traditional media. So when I actually get around to posting it'll be colored in a combo of watercolors and gouache.

That's a bit concerning! worried I work at 300 dpi, although the images I post online are reduced to 72dpi so that they load quickly. The images I posted in this thread were heavily compressed, again so that they load quickly (the Tapastic forums are tricky on those of us without highspeed internet, large images don't help!)
What is it about my comic that makes you concerned about the dpi? I wonder if you're picking up another issue here!

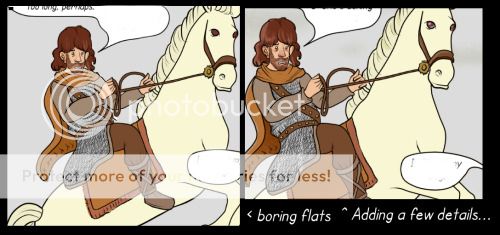
Sorry about your problem @keac but I think the folks here have the right of it. Using separate layers for color, inks and shades, in addition to expanding the selection of your area is going to make the biggest difference.

Like many here, I use Photoshop on the inks for my teams comic, Kamikaze2.

I do the ink and paint, so my work is pretty similar to others:

I do the first pass of inks, and then add in the fills.

Then I lay down my guides for shading on a separate layer using a REALLY obnoxious color so I can see where I'm filling in.

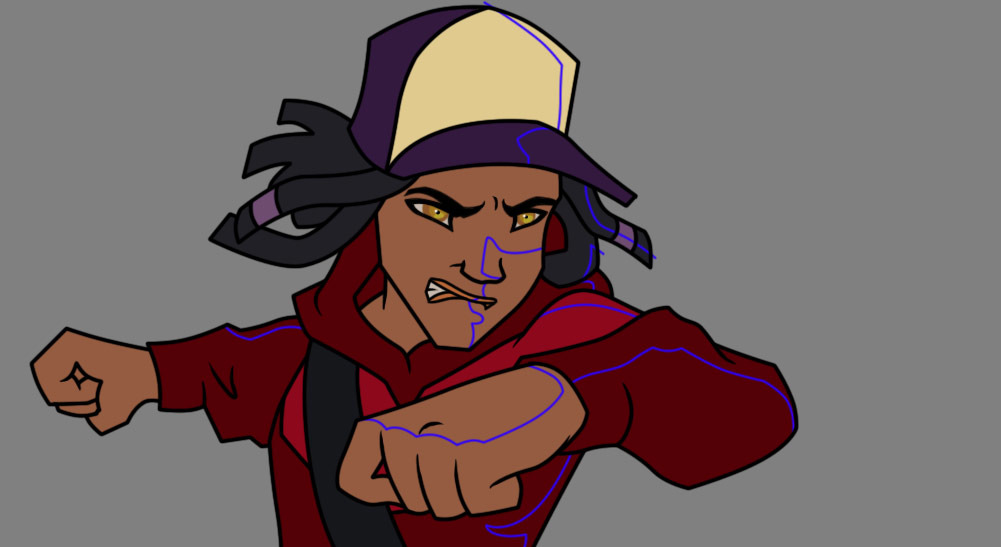
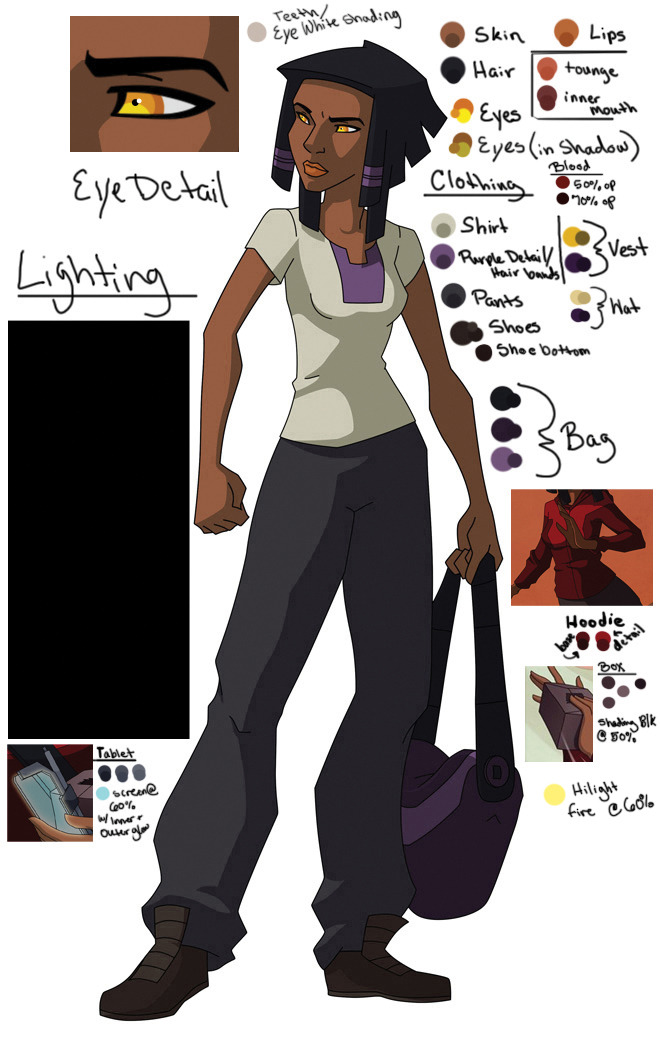
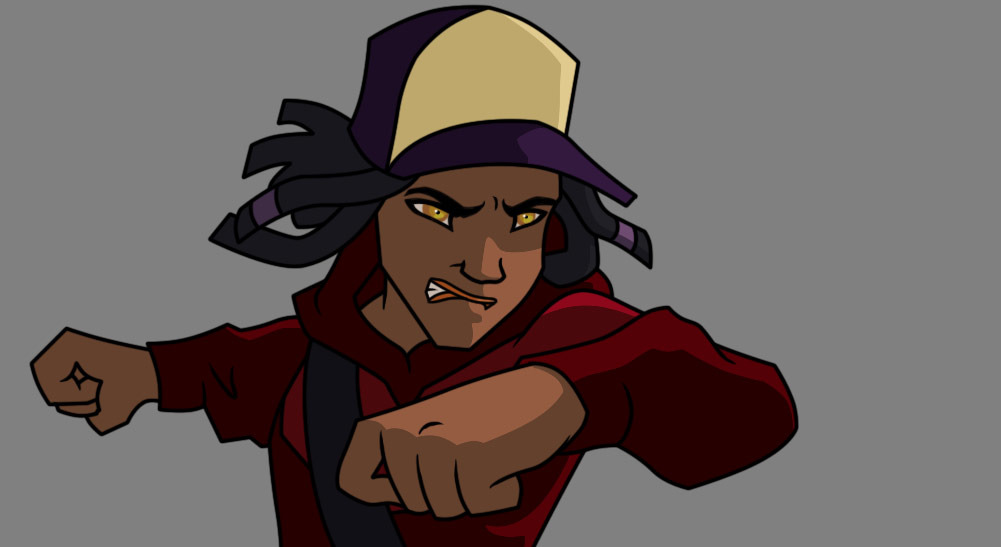
I create a new layer for each element that I'm shading, so for example in this image it would be hat, hair, skin, hoodie, and bag strap. Then I fill in these areas using a magic wand and a handy-dandy color map I created for reference.

Color ref

And then the shades.

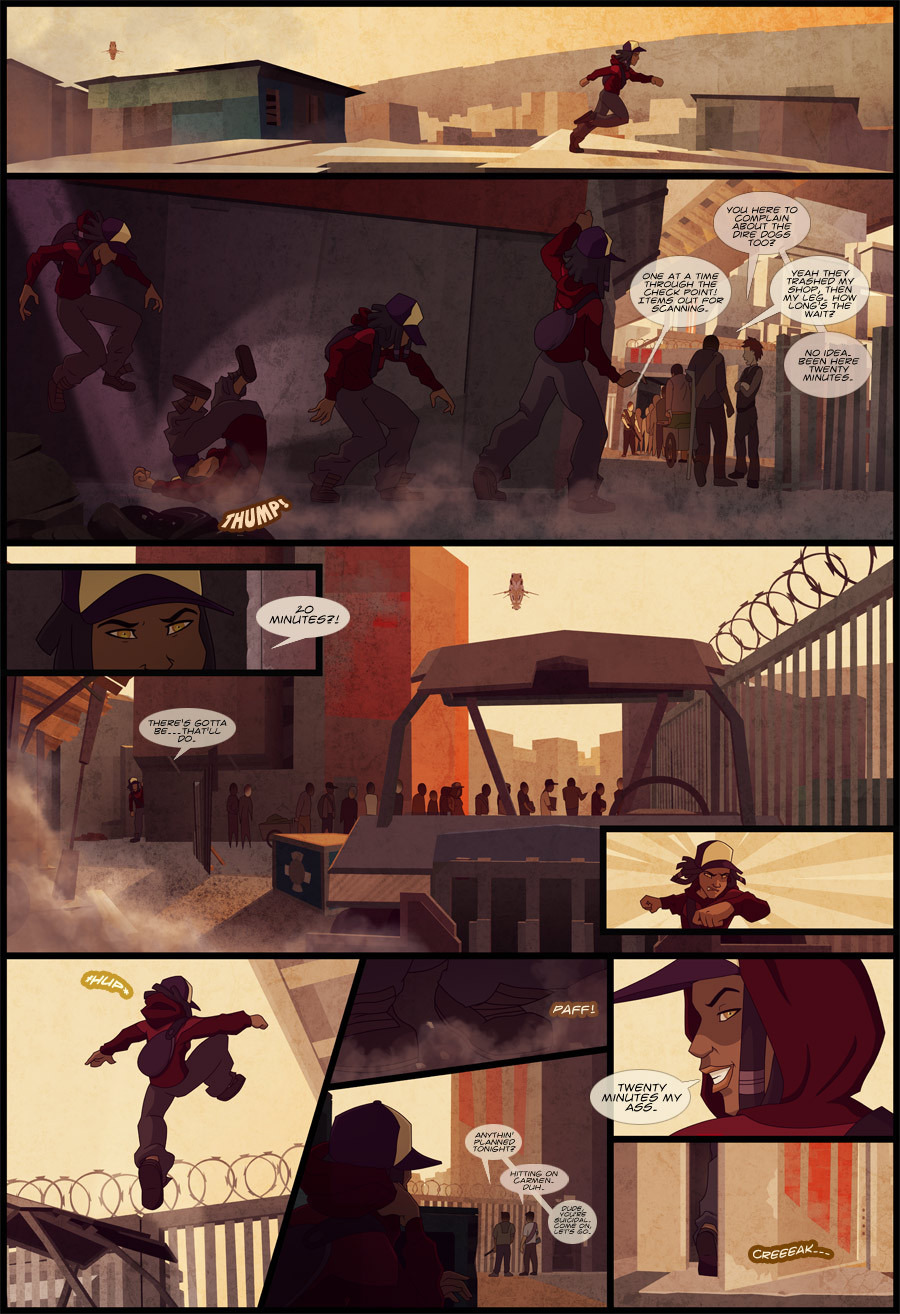
From there compositing begins (as the backgrounds are also colored in photoshop) and additional lighting, texture and gradients are added to make the characters look more in line with the environment. So the end result goes from

This (flat inks and color)

To the shades

To the full page finished and completely composited together with background, effects, and lettering.

Yes, yes! I also do the wand tool "select/modify/expand" and set it between 3 and 5 pixels depending on the thickness of my lineart, then fill. It saves a lot of time just by going in groups of white/grey/red/black/etc..

I don't know if you're using it, but check out reference layers in Clip Paint/Manga Studio. How I usually color:

  1. My inks are done on their own transparent layer
  2. Make the ink layer a reference layer (this tutorial on youtube might be useful2)
  3. Make a new layer under the ink one (called flats)
  4. Use the paint bucket tool, select the color you want, and you can paint bucket fill areas.

Some tips: In the paint fill tool submenu you can change how the paint bucket fills in the area including increasing the amount of border pixels it'll fill, this way for most inked shapes you can get the majority the shape without specs everywhere. If you do have specs, just use the g-pen and fill it in on the flats layer. Ideally, the flats should be anti-aliased, but I generally don't care since the aliased edges are hidden under the inks.

You can also color your lines easily by putting a layer over your inks and then using a clip layer to isolate it so it only changes the color of the lines. It's a nice way to blend in your lines with the shaded artwork.

I do this, whenever I can! It really helps avoid empty pixels and missed bits. I then lock the layer+select the colour with the magic want, if I want to add any details directly to the flats instead of a separate layer for shadows/highlights.

You have to adjust the Area Scaling and Color Margin on the wand tool in order to make sure that they are adjusted to appropriate values so as ro select the whole area without leaving any white spaces then that way you fill to your heart's content smiley

I find myself using the magic wand tool A LOT! I end up making a layer for each of the elements I color (hair, skin, clothes, 1 for background and 1 with the actual line art, also several for effects). Magic wand tool saves me a lot of time though, and whatever the wand doesn't catch, I color it in manually. :3